Turtle Friends & Forever Blossoms Cards From whimsical to elegant…this card layout is fun for all kinds of looks!
Background Basics—I started by adhering 1/2" strips of 2021-2023 In Color Designer Series Paper in Fresh Freesia, Polished Pink and Pale Papaya patterns across a 3-3/4" x 4-1/4" piece of Basic White. Once they were secured in place, I trimmed the edges and mounted the layer onto a 3-7/8" x 4-3/8" piece of Basic Black cardstock. I also added a Turtle Friends sentiment in Mint Macaron ink before adhering it to a Polished Pink card base.

Terrific Turtle—I stamped the large Turtle Friends turtle in Memento Black ink onto scrap Mint Macaron cardstock and punched him out with the Turtle Punch. Then I stamped him again onto Basic White and stamped the greeting in Polished Pink ink in the shell. I punched out the white turtle, then hand-cut the shell out and paper pieced it onto the Mint Macaron turtle. I also used that tiny circle on the Turtle Punch to punch out the white turtle eye and adhered that in place onto the Mint Macaron turtle.
I die-cut a Basic White circle and Polished Pink scalloped circle using the Layering Circles Dies and adhered them to the card front with SEAL adhesive. The turtle is popped up with Dimensionals over the top.
Finishing Touches—I stamped the Turtle Friends party hat in Memento Black ink onto Basic White, colored it in with Fresh Freesia, Polished Pink and Pale Papaya Stampin' Blends Markers, hand-cut it out and popped it up with a Mini Dimensional. I finished the card by coloring some Rhinestones Jewels with the Dark Polished Pink Blends Marker and scattering them around the circle. Adorable!
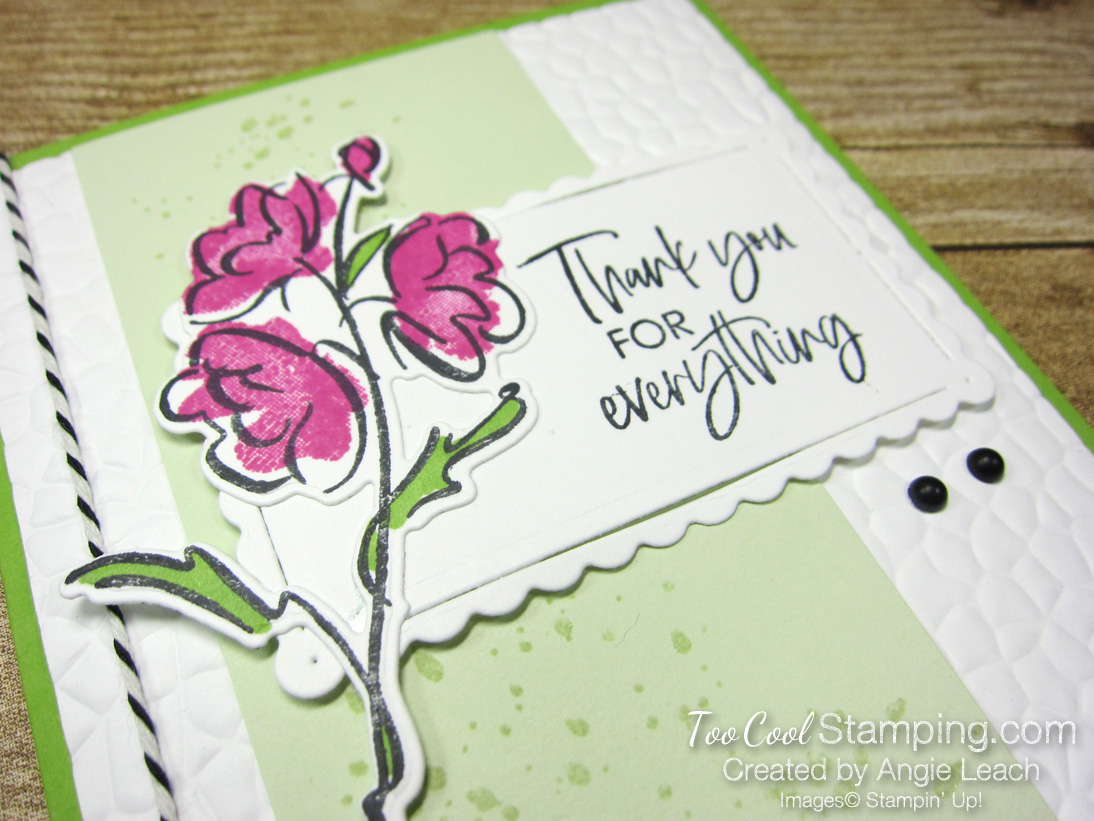
Two Cool—I decided to go "pretty" for my next card with a similar layout. This time, I used strips of Hydrangea Hill Designer Series Paper (retiring soon!) onto a 3-3/4" x 5" piece of Basic White. It's layered onto a 3-7/8" x 5-1/8" piece of Misty Moonlight cardstock and mounted onto a Fresh Freesia card base. I stamped the Forever Blossoms sentiment in Blackberry Bliss ink onto Basic White, punching it out with the retired Story Label Punch and adding it to the card front, too.

Beautiful Blossoms—I stamped the Forever Blossoms image in Basic Gray onto Basic White cardstock, then colored it in with Fresh Freesia, Balmy Blue and Blackberry Bliss Stampin' Blends. It's die-cut with the coordinating Cherry Blossoms Dies and popped up with Dimensionals.
Finishing Touches—I colored the Rhinestones in Dark Misty Moonlight Blends this time. Gorgeous and perfect for a wedding card!
Shop Items To Make These Projects
I'd Love To Hear From You!


")

 Designer Series Paper")


")


